EdgeBit gives developers context about new and modified software dependencies when submitted a pull request or pushing a new commit before it merges into main.
This context is useful for:
- vulnerabilities: understand vulnerabilities present in the selected version(s)
- recommendations: see a recommended version with fixed vulnerabilities, if available
- standardization: gain context about versions of the same dependency that other teams may be using at your organization – think of this as a gentle nudge to standarize via social proof
This document will walk through adding a step to a Buildkite pipeline to generate and upload an SBOM to EdgeBit. Optionally, a GitHub check can be used to display issues found inside of a Pull Request.
The action uses the Syft open source project to generate the software bill of materials (SBOM).
Create Pipeline File
Select the container based pipeline for the most accurate results.
Use this pipeline if your deployment artifact is a container.
In your code repo, create .buildkite/edgebit/container-syft.yaml with the default config file.
$ mkdir -p .buildkite
$ mkdir -p edgebit
$ curl -sL https://edgebit.io/docs/0.x/assets/container-syft.yaml > .buildkite/edgebit/container-syft.yaml
Run the download steps before your container build step and the SBOM upload afterwards. Here’s an example pipeline.yml:
env:
  EDGEBIT_COMPONENT_NAME: foobar
  CONTAINER_NAME: example/foobar
  EBCTL_VERSION: v0.8.1
steps:
  - label: Download Syft
    command: |
      if [ ! -f "/usr/local/bin/syft" ]; then
        curl -sSfL https://raw.githubusercontent.com/anchore/syft/main/install.sh | sudo sh -s -- -b /usr/local/bin v1.4.0
      fi

  - label: Download EdgeBit CLI
    command: |
      cd /usr/local/bin
      curl -sSfL "https://install.edgebit.io/releases/edgebit-cli/${EBCTL_VERSION}/edgebit-cli_Linux_$(uname -m | sed 's/aarch64/arm64/').tar.gz" | sudo tar xz

  - label: Build Container
    command: |
      docker build \
        --tag "$CONTAINER_NAME" \
        .

  - label: Generate SBOM from container
    command: |
      cd "$BUILDKITE_BUILD_CHECKOUT_PATH"
      /usr/local/bin/syft \
        --quiet \
        --config .buildkite/edgebit/container-syft.yaml \
        --output spdx-json=/tmp/sbom.spdx.json \
        scan \
        "$CONTAINER_NAME"

  - label: Upload SBOM to EdgeBit
    command: |
      /usr/local/bin/ebctl upload-sbom \
        --commit $BUILDKITE_COMMIT \
        --component "$EDGEBIT_COMPONENT_NAME" \
        --repo "$BUILDKITE_REPO" \
        --image-tag "$CONTAINER_NAME" \
        --image-id $(docker image inspect --format '{{.ID}}' $CONTAINER_NAME) \
        --repo-digest $(docker image inspect --format '{{join .RepoDigests ","}}' $CONTAINER_NAME) \
        --pull-request "$BUILDKITE_PULL_REQUEST" \
        /tmp/sbom.spdx.json
Use this pipeline if you don't build containers out of your code.
In your code repo, create .buildkite/edgebit/source-syft.yaml with the default config file.
$ mkdir -p .buildkite
$ mkdir -p edgebit
$ curl https://edgebit.io/docs/0.x/assets/source-syft.yaml > .buildkite/edgebit/source-syft.yaml
These pipeline steps can run alongside other BuildKite steps you may use. Create or modify pipeline.yml:
env:
  EDGEBIT_COMPONENT_NAME: foobar
  EBCTL_VERSION: v0.8.1
steps:
  - label: Download Syft
    command: |
      if [ ! -f "/usr/local/bin/syft" ]; then
        curl -sSfL https://raw.githubusercontent.com/anchore/syft/main/install.sh | sudo sh -s -- -b /usr/local/bin
      fi

  - label: Download EdgeBit CLI
    command: |
      cd /usr/local/bin
      curl -sSfL "https://install.edgebit.io/releases/edgebit-cli/${EBCTL_VERSION}/edgebit-cli_Linux_$(uname -m | sed 's/aarch64/arm64/').tar.gz" | sudo tar xz

  - label: Generate SBOM from source code
    command: |
      cd "$BUILDKITE_BUILD_CHECKOUT_PATH" &&
      /usr/local/bin/syft \
        --quiet \
        --config .buildkite/edgebit/source-syft.yaml \
        --output spdx-json=/tmp/sbom.spdx.json \
      scan \
      .

  - label: Upload SBOM to EdgeBit
    command: |
      /usr/local/bin/ebctl upload-sbom \
        --commit $BUILDKITE_COMMIT \
        --component "$EDGEBIT_COMPONENT_NAME" \
        --repo "$BUILDKITE_REPO" \
        --pull-request "$BUILDKITE_PULL_REQUEST" \
        /tmp/sbom.spdx.json
These pipeline steps do the following:
- Generates a software bill of materials (SBOM) by detecting most common programming languages, by using the Syft open source project, either from:
- an existing container build step using
CONTAINER_NAME
- from source code using
BUILDKITE_BUILD_CHECKOUT_PATH,
- Uses your EdgeBit Access Token to upload the SBOM to EdgeBit and ties it to the specific commit
- Groups the stream of SBOMs into a Component for tracking changes over time
Set Pipeline Variables
Fill in the required variables in the env section:
| Variable Name |
Description |
Value |
EDGEBIT_COMPONENT_NAME |
Name of the EdgeBit Component |
Required
foobar |
CONTAINER_NAME |
Full registry path of your container image |
Required for containers
registry.example.com:foobar:v1.2.3 |
Set Pipeline Secrets
In the EdgeBit Console, generate a new Access Token for this pipeline to use. You can find this in the left hand navigation under “Access Tokens”.
Save this into the secret management tool you use for Buildkite.
Your EdgeBit organization URL is not a secret but you can also store it as a secret.
| Secret Name |
Description |
Value |
EDGEBIT_URL |
EdgeBit organization URL |
Required
https://foo.edgebit.io |
EDGEBIT_API_KEY |
EdgeBit Access Token |
Required |
Set Up the GitHub app
Optionally, use the EdgeBit’s GitHub app to allow Developers to see a new EdgeBit check on their PRs:
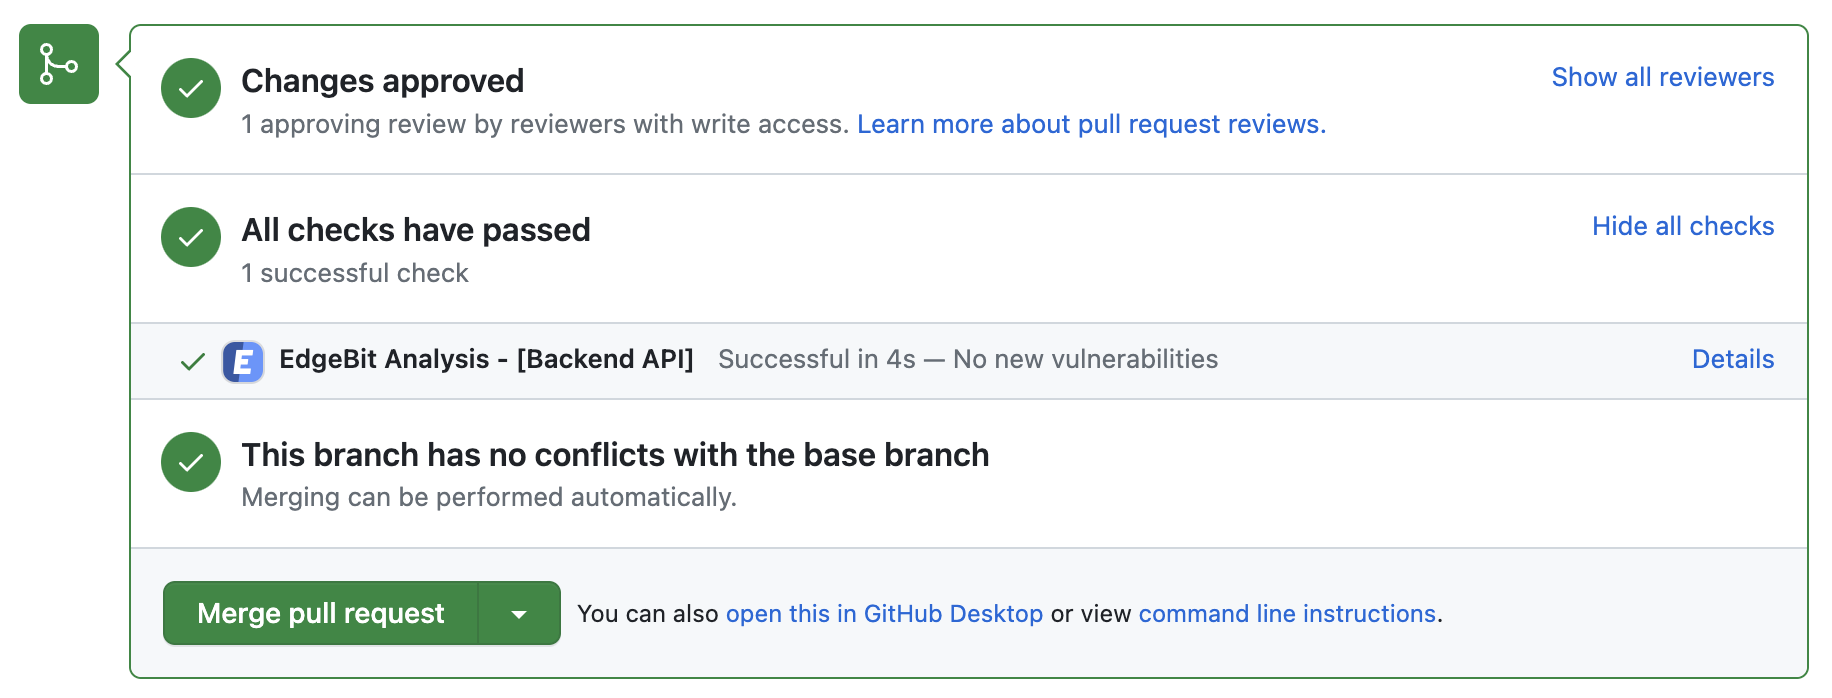
- Comments on the PR if new dependency changes are detected, highlighting:
- New vulnerabilities and supply chain risks introduced by the changes
- Confirming addition, modification or removal of dependency changes without issues
- Link to more detail within EdgeBit about the current state of all known vulnerabilities
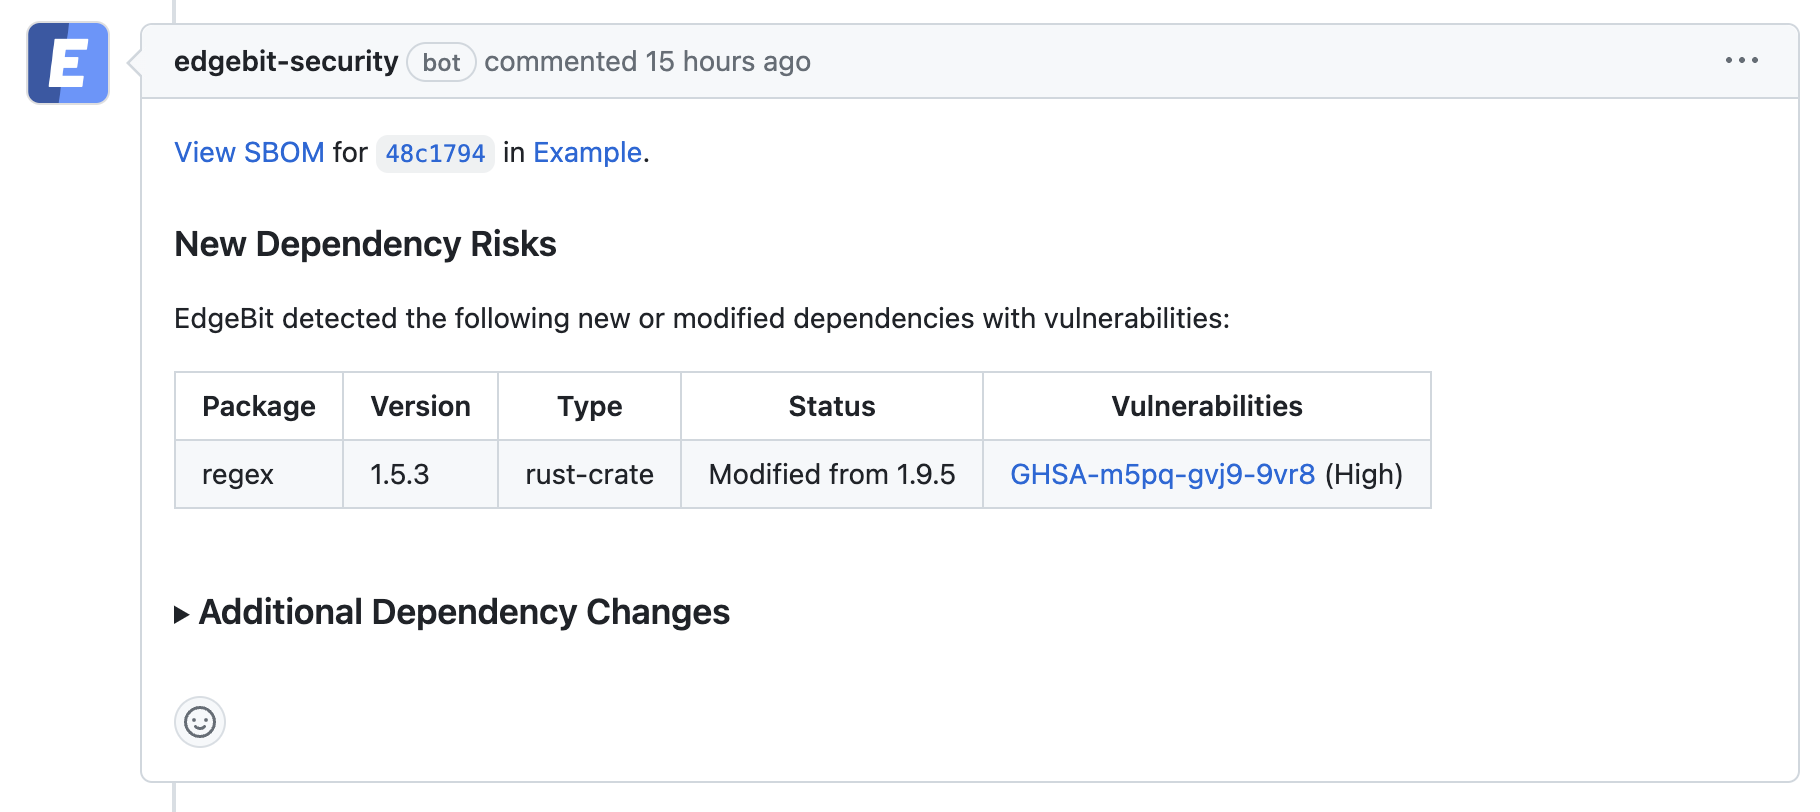
If a PR makes dependency changes and new issues are found, EdgeBit will comment with more information:
To set up the GitHub app, an admin should do the following:
- In the EdgeBit Console, click on “Integrations” in the left navigation pane.
- Click “New Integration” to start the GitHub app installation process.
- Grant EdgeBit access to all repos in an organization or a subset.
- Choose which project(s) the GitHub integration should be used with.
Test the Integration
Create a new branch and commit the changes that add .buildkite/pipeline.yml. You should see the new steps being run immediately.
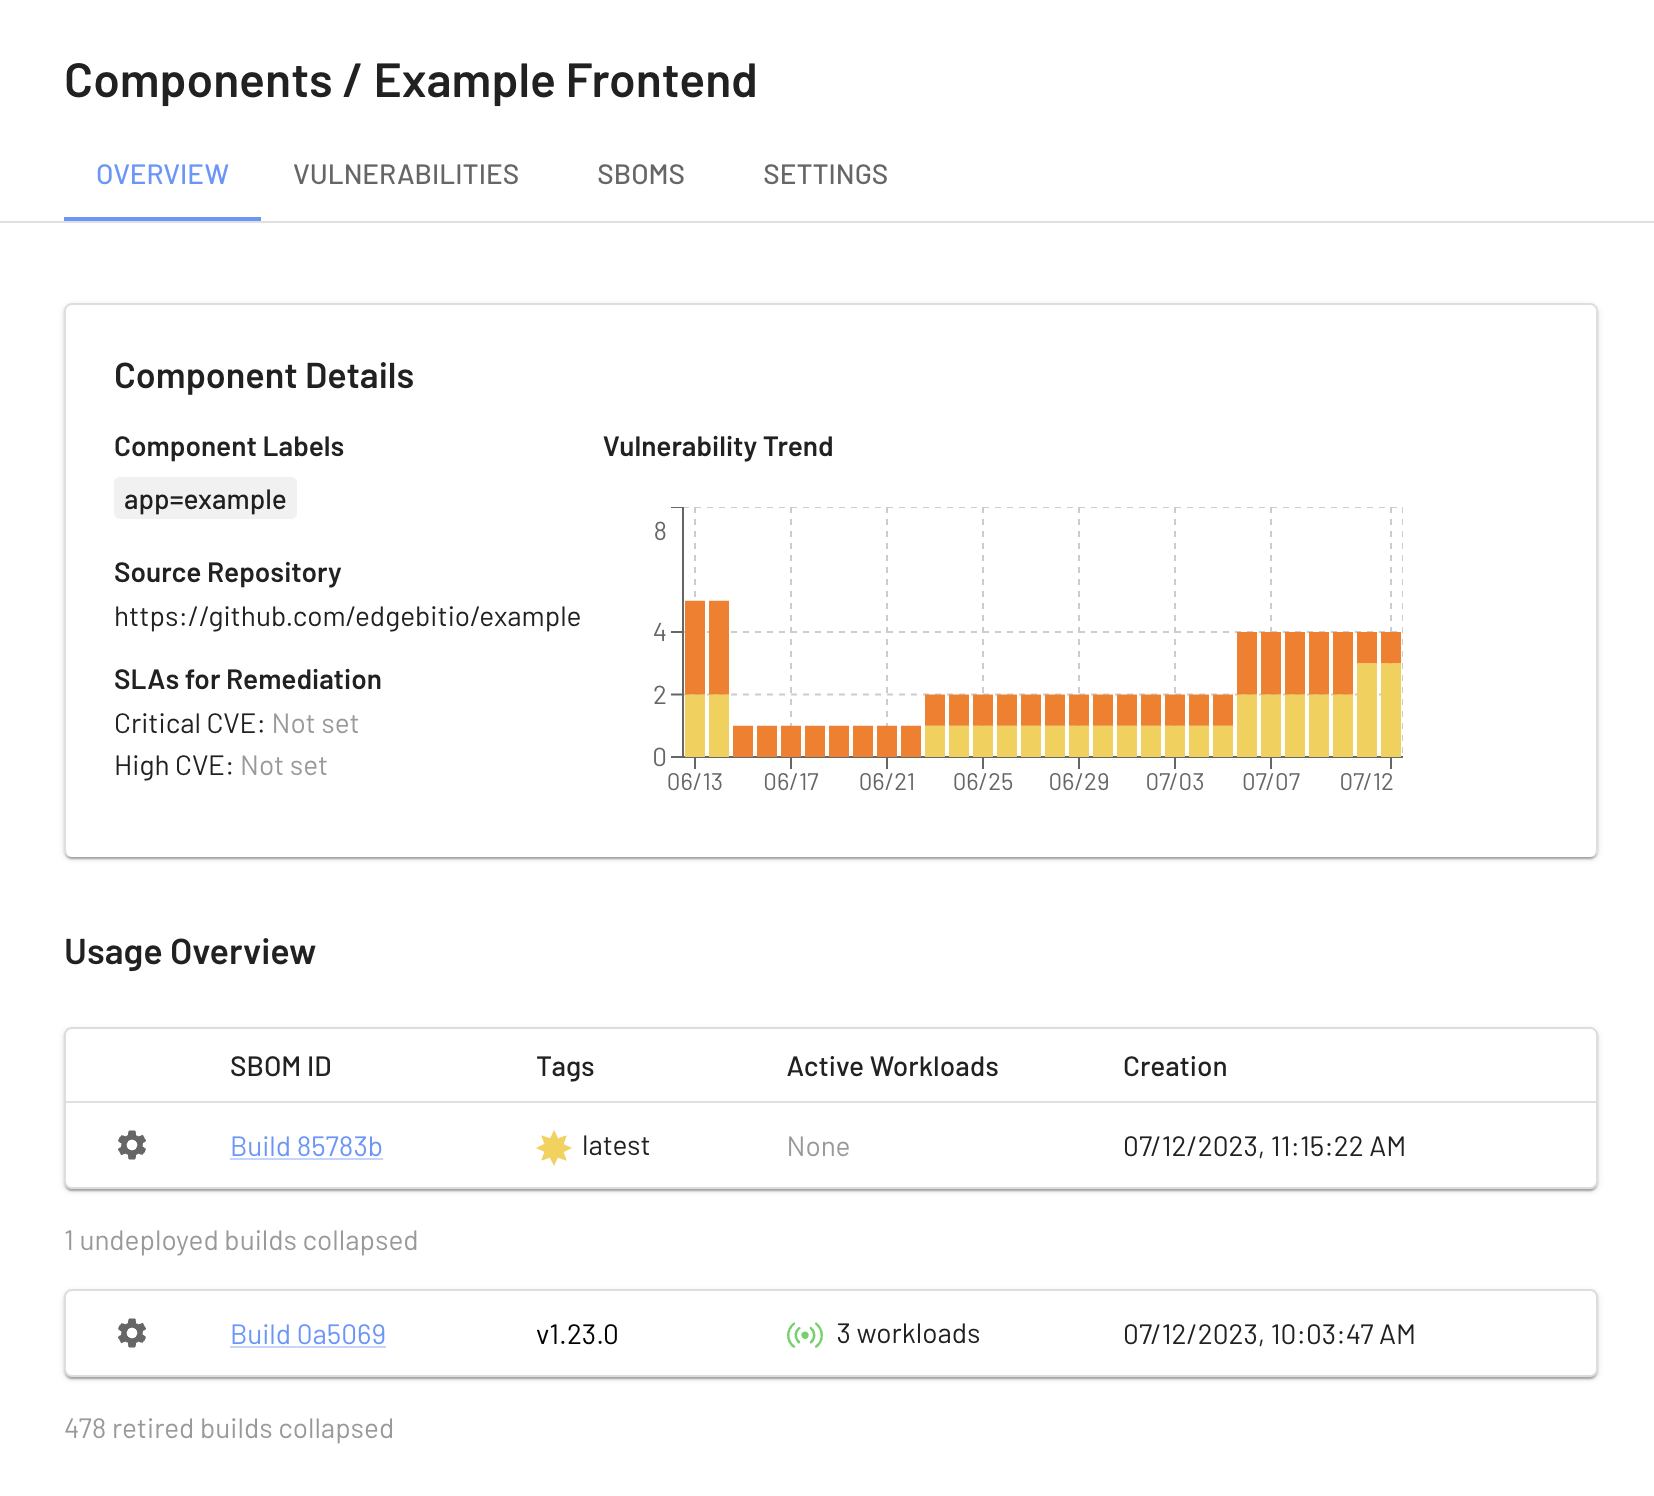
View your Build Artifacts in the EdgeBit Console
Your EdgeBit Console contains reports about each SBOM uploaded and the current state of all vulnerabilities in your software Components.
Next: Install Machine Agent