EdgeBit gives developers context about new and modified software dependencies when submitted a pull request or pushing a new commit before it merges into main.
This context is useful for:
This document will walk through installing EdgeBit GitHub integration into your GitHub organization(s). Multiple organizations can be mapped into one or many EdgeBit projects.
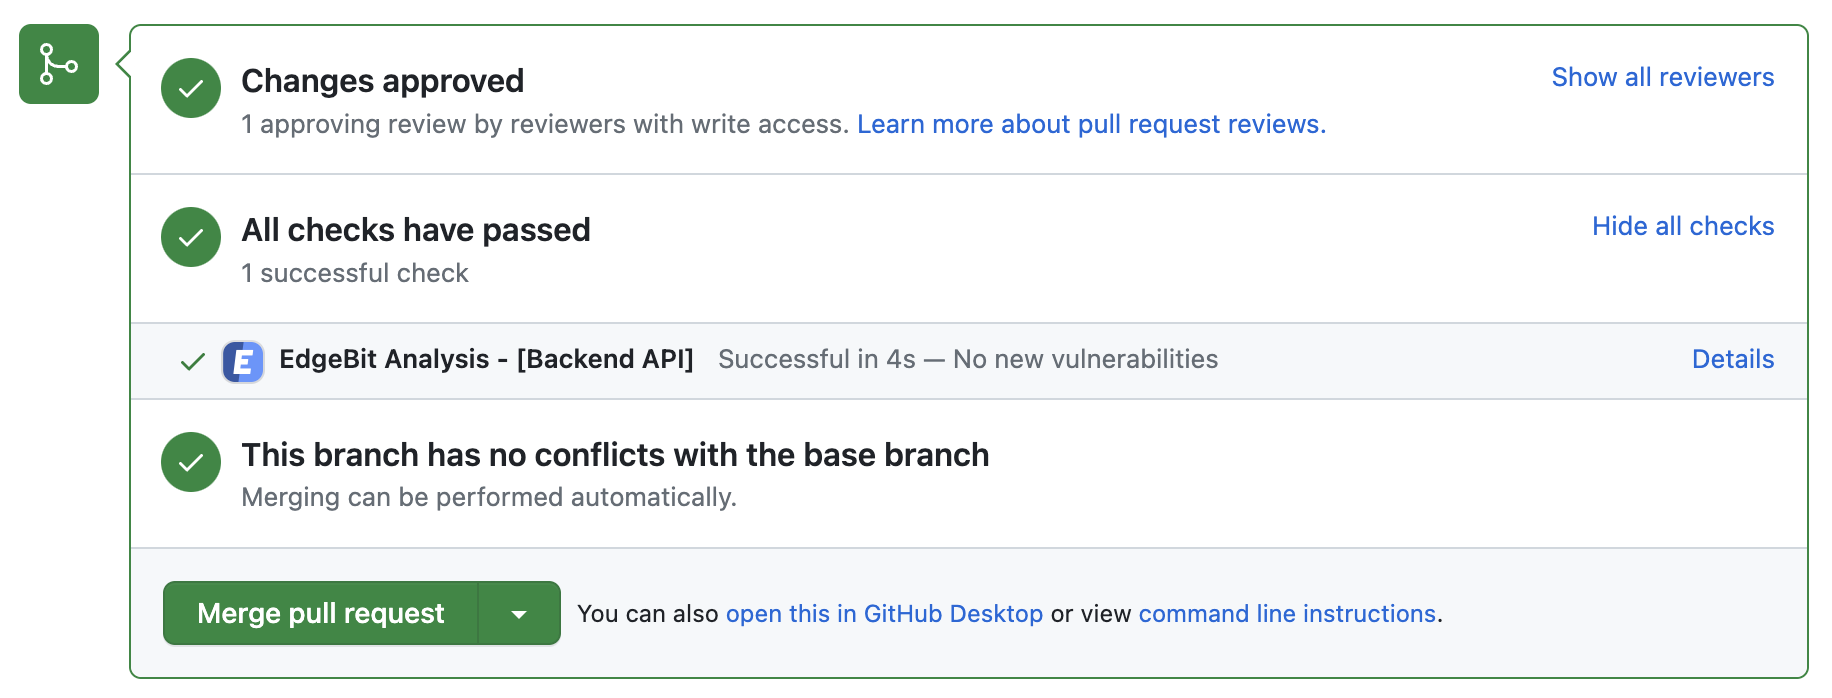
Developers will see a new EdgeBit check on their PRs:
The GitHub integration consists of two parts:
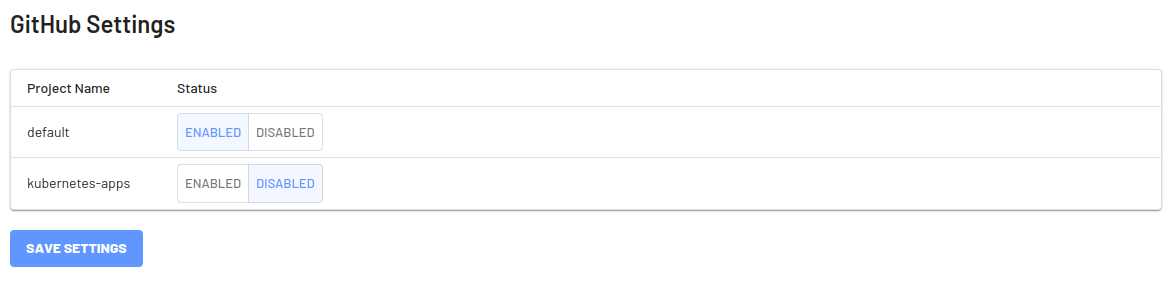
An admin should do the following:
First, navigate over to the Component and click “Import from GitHub” to view a list of list of available repositories.
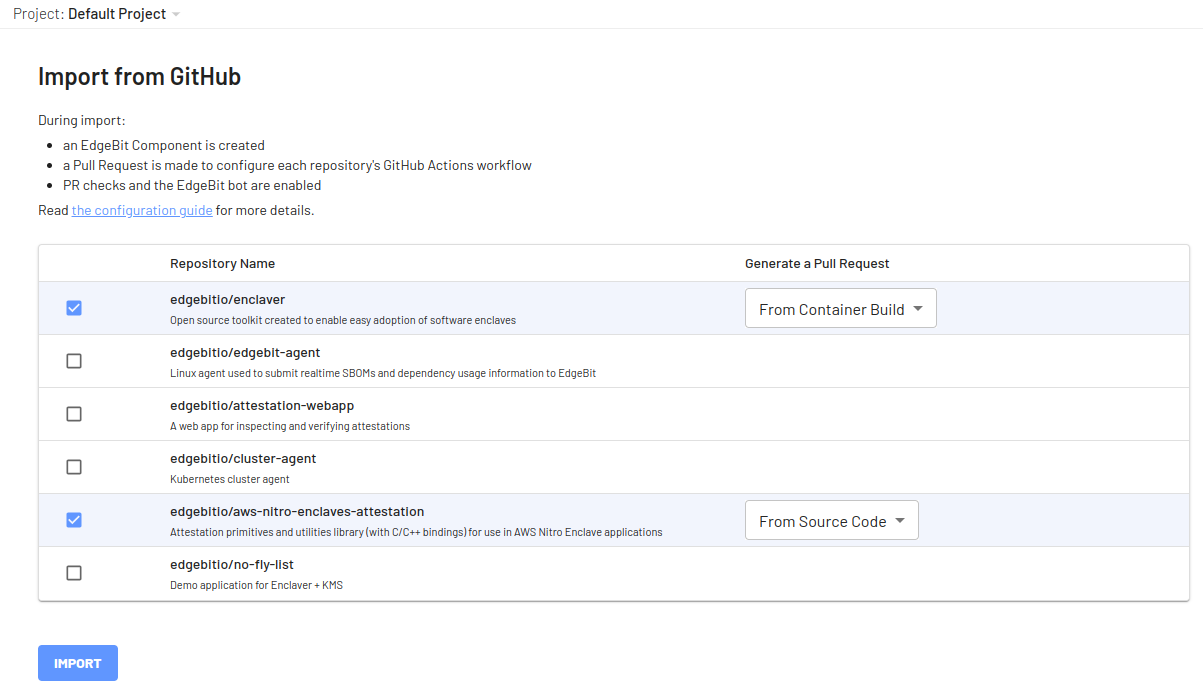
Select the repository(s) along with the type of Pull Request to open in order to modify the Actions Workflows.
For container builds, which are recommended, the SBOM generation step is intelligently added after your container is built without touching the rest of the Actions workflow. For more control, you can customize GitHub Actions. A new EdgeBit component is created along side a Pull Request with the changes to the workflow definitions.
Before merging the set up Pull Request, create and save an EdgeBit access token as a repository secret. You can generate a unique access token per repository or use a single token for multiple repos.
In the EdgeBit Console, generate a new Access Token. You can find this in the left hand navigation under “Access Tokens”.
Save it in GitHub under the repository GitHub Action secrets named EDGEBIT_TOKEN.
Once that PR is merged, the Component will track the SBOMs and you can test out the new supply chain checks in your workflow.
Ensure the set up Pull Request is merged before testing out the bot.
Open a Pull Request to see the bot in action. EdgeBit’s GitHub app allows Developers to see a new EdgeBit check on their PRs:
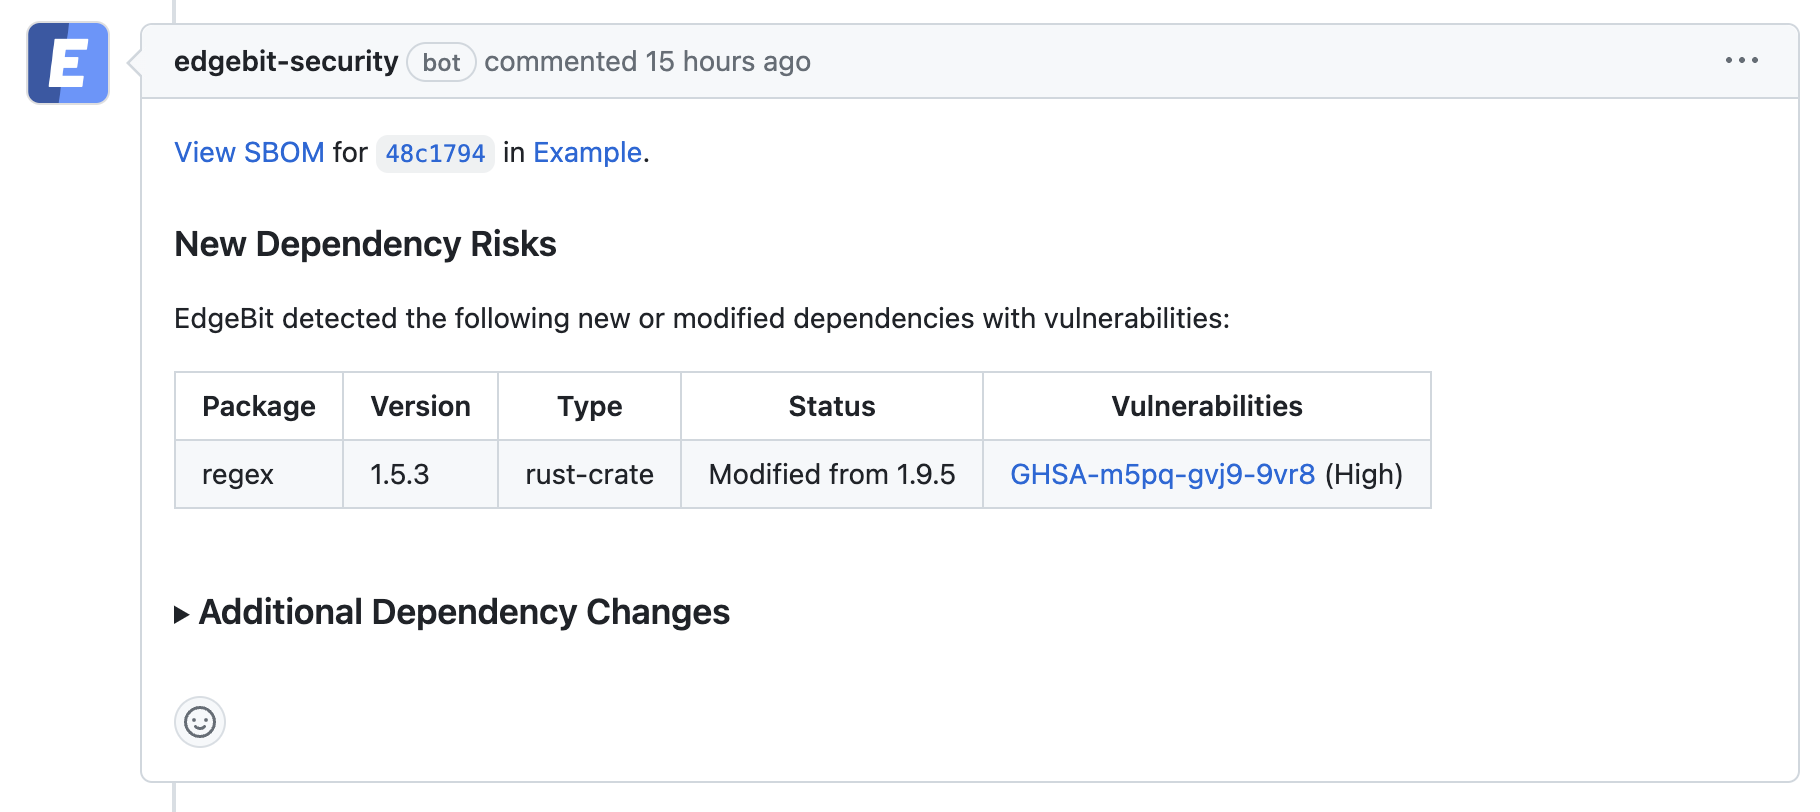
If a PR makes dependency changes and new issues are found, EdgeBit will comment with more information:
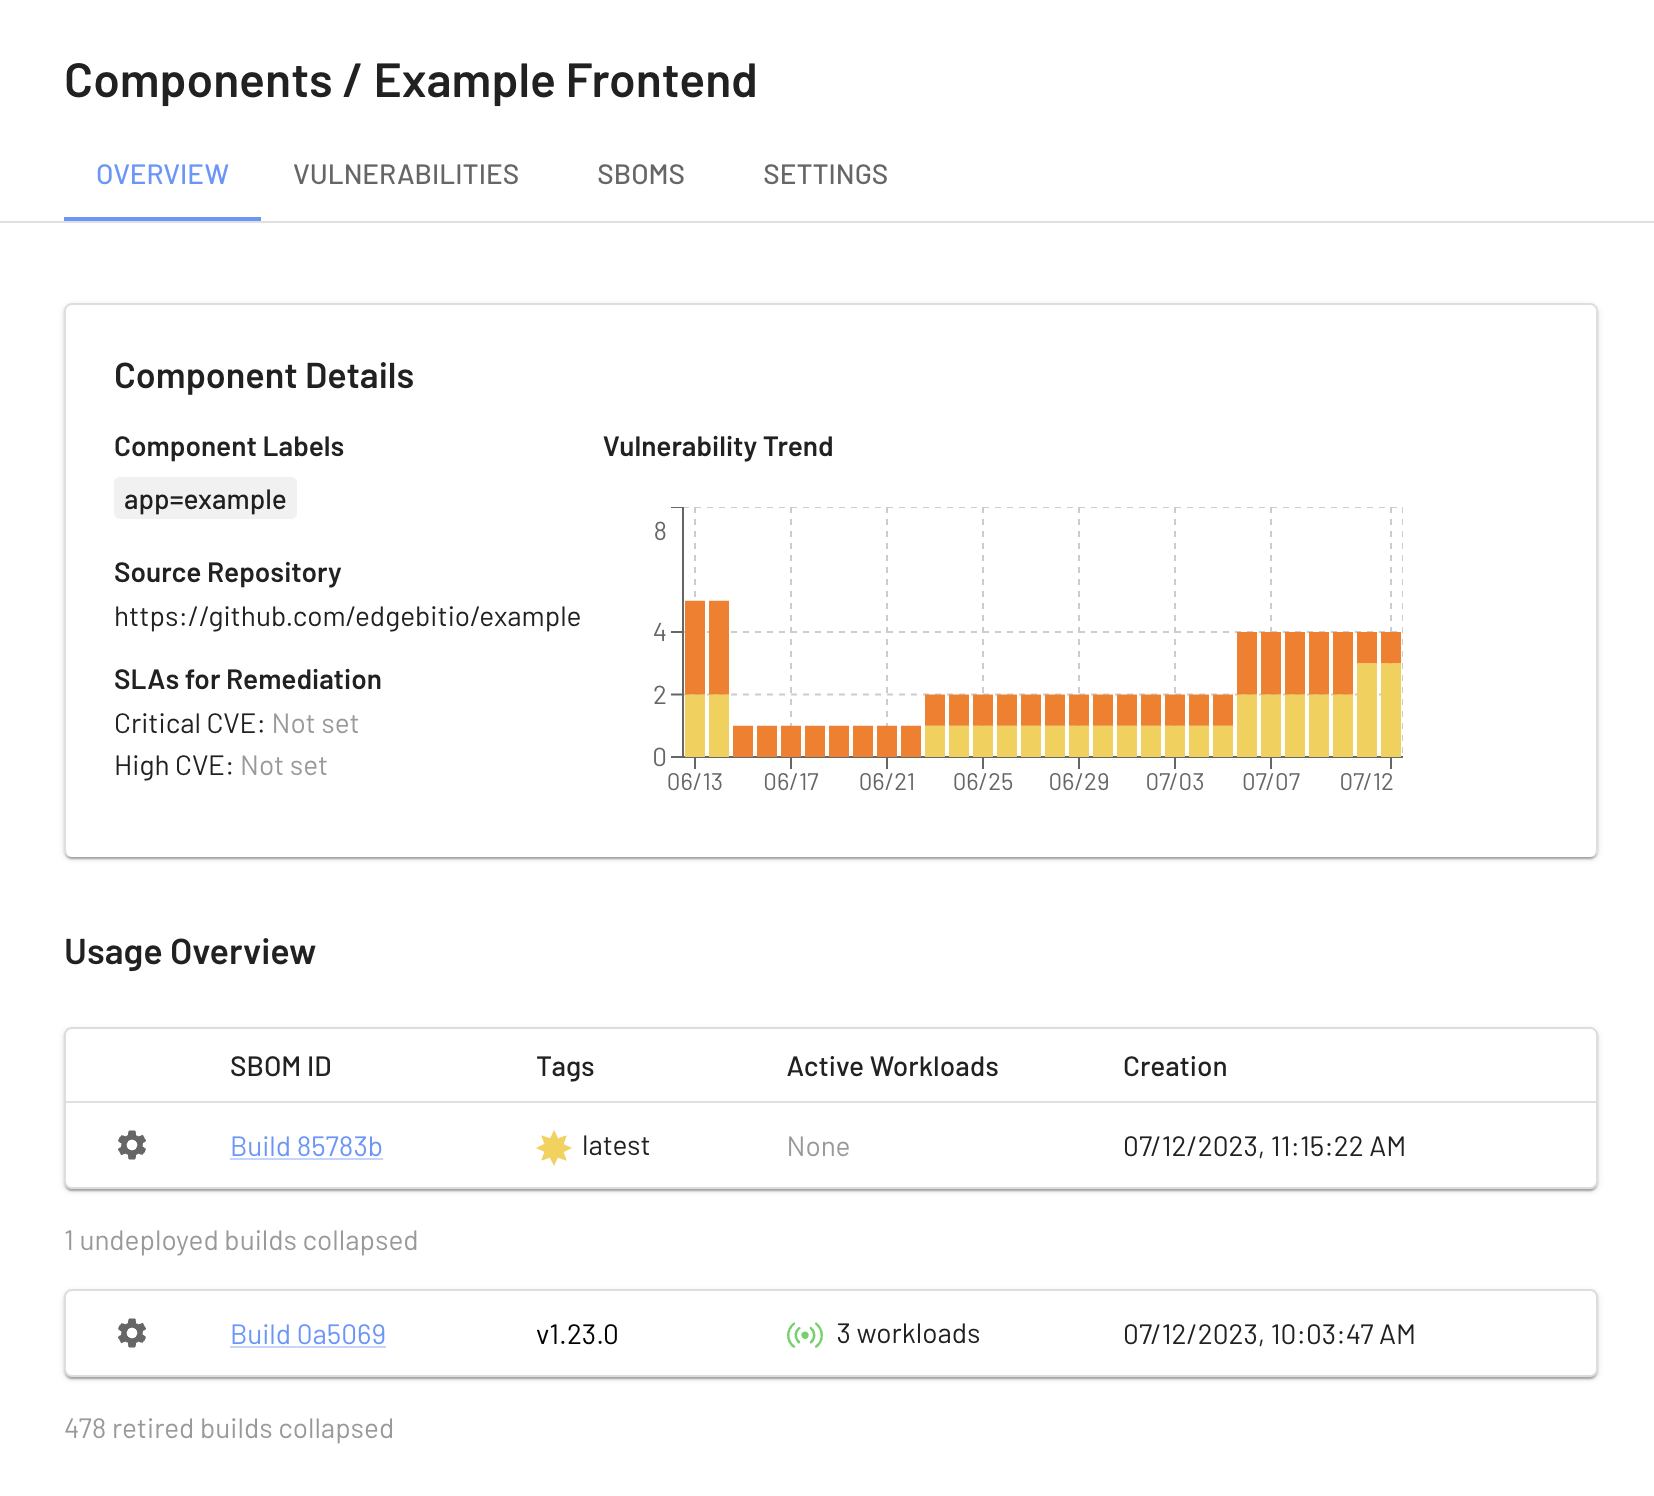
Your EdgeBit Console contains reports about each SBOM uploaded and the current state of all vulnerabilities in your software Components.