Syncing to Jira Issues
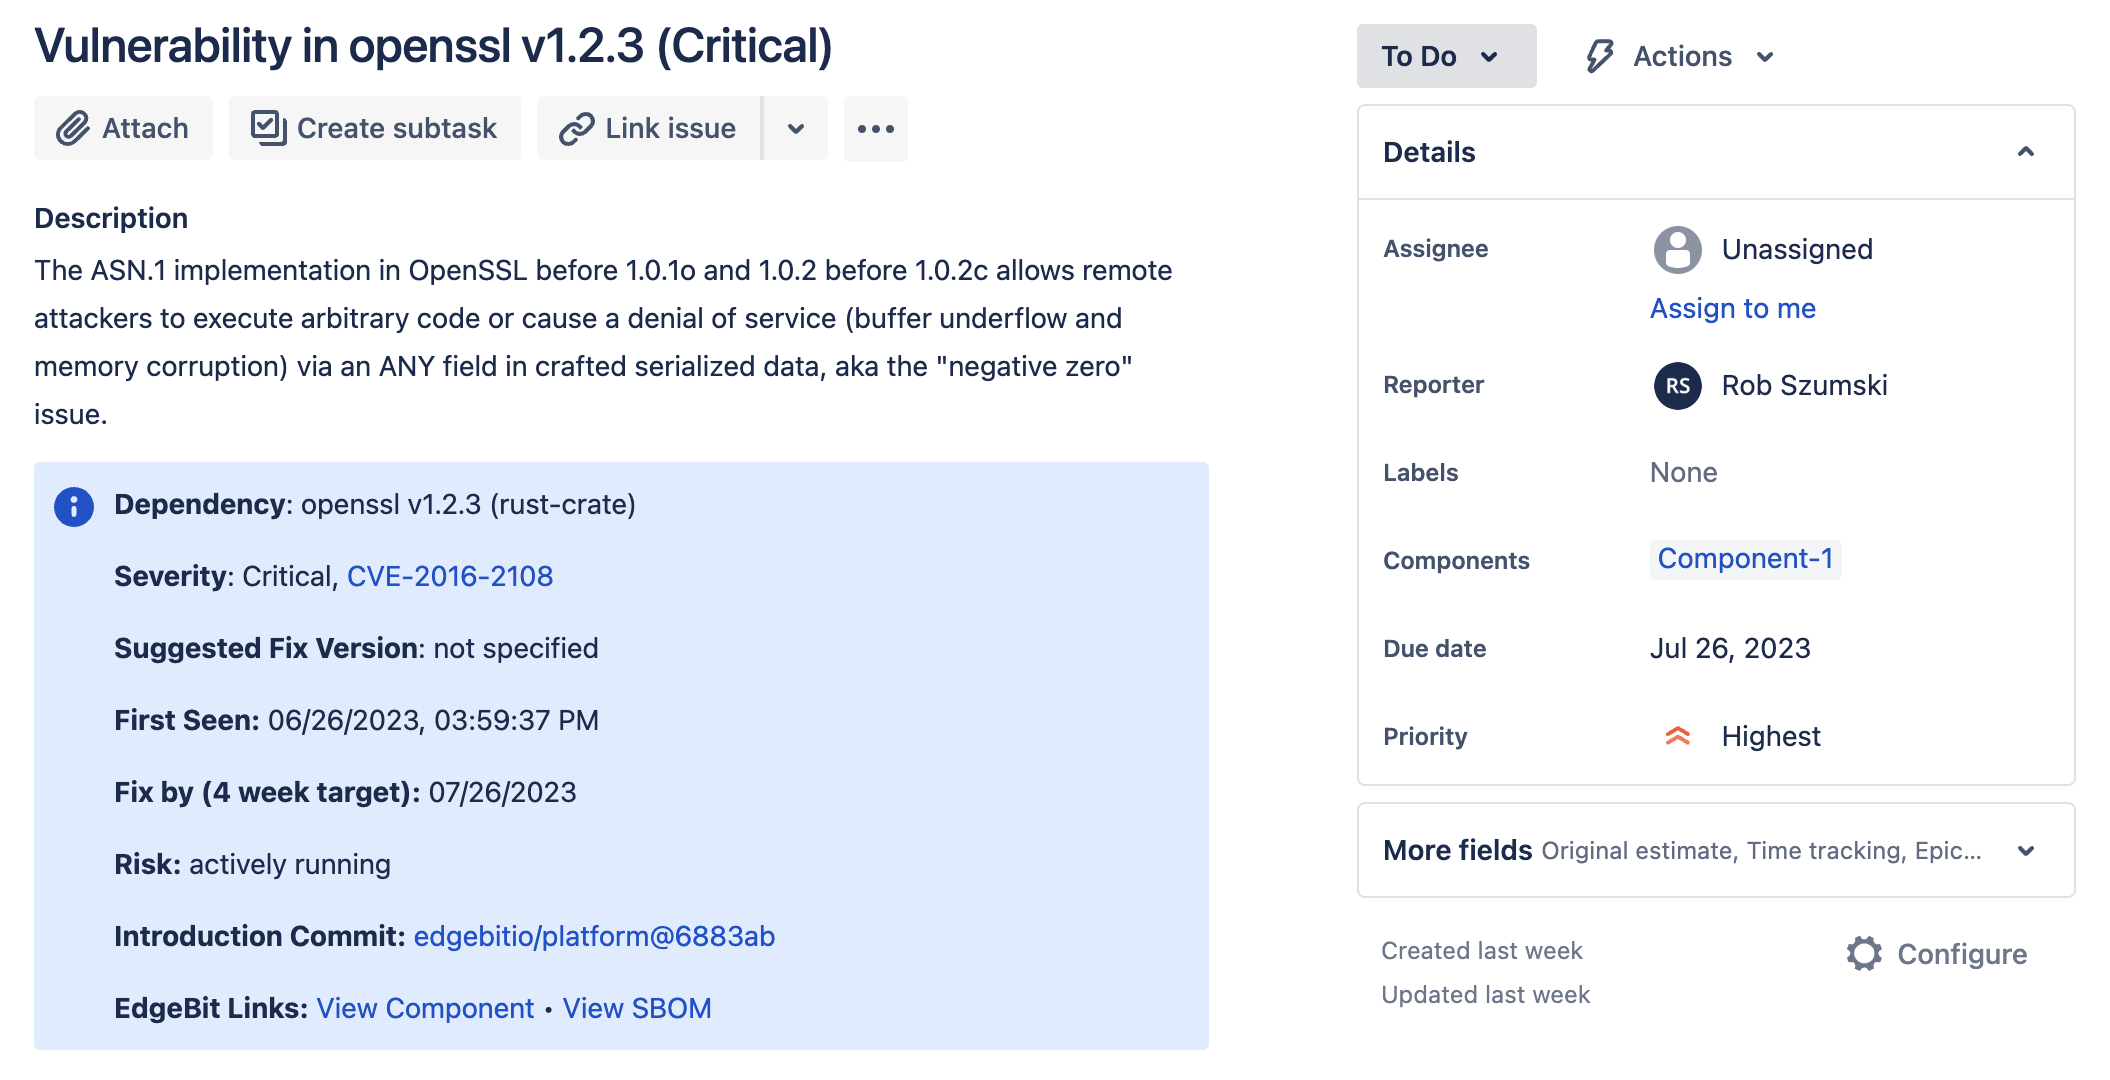
Connect your EdgeBit account to Jira to automatically create, update and close Issues connected to EdgeBit security issues.

It’s easy to pull items into your sprints and watch them be automatically closed as the fixed version is merged to main and then spotted out in your production inventory.
Connect to your Jira account
In your EdgeBit account, head over to “Integrations” and click “Activate” on Jira to complete the integration flow with Atlassian.
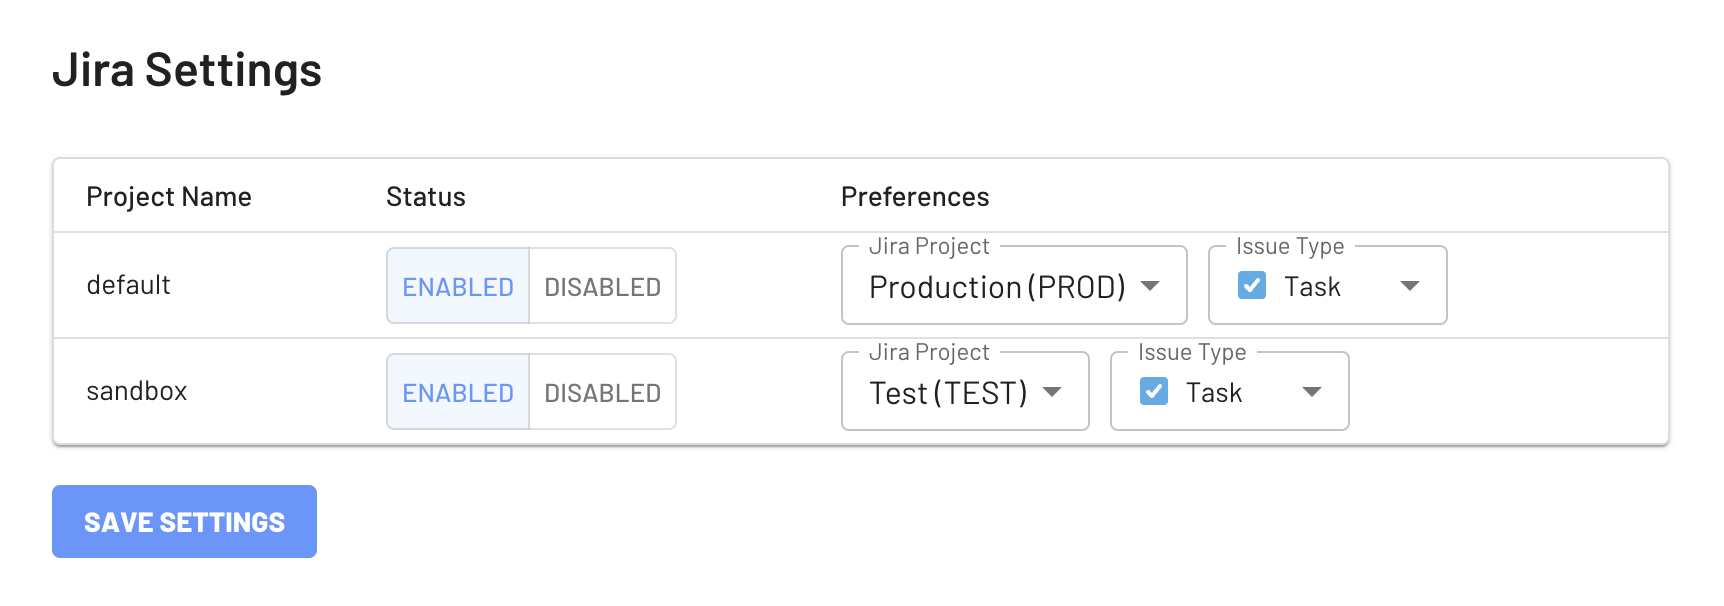
After that is complete, map your EdgeBit projects to the desired Jira Board and Issue type.

Automatic Issue Sync
Issues are automatically created and updated in a one-way manner, EdgeBit → Jira.
All of the information needed to remediate the vulnerability is included in the issue, including SLA tracking, EdgeBit’s real-time context and links for further details.
Here’s a summary of events that may update a Jira issue:
| Description |
Jira Change |
| Vulnerability is fixed by your team and deployed |
status→Done |
| Security researchers modify the severity of an issue |
priority
due date |
| Vulnerable package transitions from dormant to active |
priority
due date |
| Vulnerability description is updated |
description |
| Vulnerability ignored through EdgeBit |
status→Done |
| Suggested fix version provided or updated |
description |
Customize Jira Board and Components
To set a Jira Component to a specific value, set the jira:component= label on your EdgeBit Component. If a development team owns several services/repos/containers, it can be helpful to set the same component across them, like jira:component=frontend.
Typically all issues in a given EdgeBit Project are placed on the same Jira Project, but this can be configured with the jira:project= label as needed on each EdgeBit Component.


