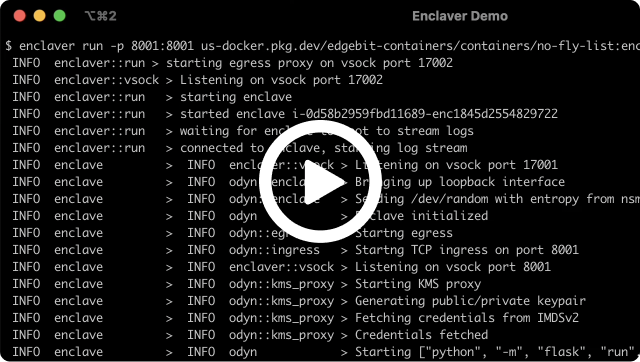
Deploy on AWS using Nitro Enclaves
Enclaver can be used with EC2 machines that are enabled to run Nitro Enclaves. This guide assumes you are running newer versions of Amazon Linux 2 and will deploy the simple Python example app.

Instance Requirements
Only certain EC2 instance types can run Nitro Enclaves. Since dedicated CPUs are carved off for the enclave, the larger x86 types with 4+ vCPUs are ok, with c6a.xlarge being the cheapest. Your machines must be booted with the Nitro Enclave option enabled.

Due to Amazon restrictions, each EC2 machine can only run a single enclave at a time.
The example CloudFormation increases the allowed hops for the Instance Metadata Service v2 from 1 to 2 to account for the docker0 bridge. Reflect this change in any customized CloudFormation that you might use.
View instructions to configure your machine manually
First, install the Nitro Enclave packages:
$ amazon-linux-extras install aws-nitro-enclaves-cli
$ yum install aws-nitro-enclaves-cli-devel -y
Then, give your user access to the Nitro Enclaves and Docker groups:
$ usermod -aG ne ec2-user
$ usermod -aG docker ec2-user
Last, configure the resources to dedicate to your enclaves:
$ sed -i 's/cpu_count: 2/cpu_count: 1/g' /etc/nitro_enclaves/allocator.yaml
$ sed -i 's/memory_mib: 512/memory_mib: 3072/g' /etc/nitro_enclaves/allocator.yaml
$ systemctl start nitro-enclaves-allocator.service && sudo systemctl enable nitro-enclaves-allocator.service
$ systemctl start docker && sudo systemctl enable docker
Starting the Nitro allocator at boot is important because hugepages needs to find contiguous sections of RAM, which is easy when nothing is using your RAM yet.
Unless you started your instance with a modified HttpPutResponseHopLimit from 1 to 2, you will need to run your container with host networking (--net=host) instead of the example shown below in order to connect to the instance metadata service.
Run via Systemd Unit
On the EC2 machine, add this systemd unit to /etc/systemd/system/enclave.service which runs the Enclaver tool in a container, then runs your specified enclave image:
[Unit]
Description=Enclaver
Documentation=https://edgebit.io/enclaver/docs/
After=docker.service
Requires=docker.service
Requires=nitro-enclaves-allocator.service

[Service]
TimeoutStartSec=0
Restart=always
ExecStartPre=-/usr/bin/docker exec %n stop
ExecStartPre=-/usr/bin/docker rm %n
ExecStartPre=/usr/bin/docker pull registry.edgebit.io/no-fly-list:enclave-latest
ExecStart=/usr/bin/docker run \
    --rm \
    --name %n \
    --privileged \
    --device=/dev/nitro_enclaves:/dev/nitro_enclaves:rw \
    -p 8001:8001 \
    registry.edgebit.io/no-fly-list:enclave-latest

[Install]
WantedBy=multi-user.target
Be sure to swap out registry.edgebit.io/no-fly-list:enclave-latest for your image location. Afterwards, start the unit and enable the unit so it starts again after a reboot:
$ systemctl enable --now enclave.service
Testing the Enclave
The example app answers web requests on port 8001 of the EC2 machine:
$ curl localhost:8001
"https://edgebit.io/enclaver/docs/0.x/guide-app/"
Jump over to the simple Python app guide (the output URL above) that explains our sample application in more detail and how to build the image that was run above.
Dedicated CPUs
If you booted a c6a.xlarge, the full machine has 4 vCPUs. By default, Enclaver dedicates 2 of those to the Nitro Enclave. Dedicated CPUs are part of the isolation and protection of your workloads in the enclave.
You can test this out by running top and then hitting 1 to show a breakdown of CPUs. Notice that CPUs Cpu1 and Cpu3 are missing here:
top - 14:48:27 up 6 min,  1 user,  load average: 0.01, 0.06, 0.03
Tasks: 111 total,   1 running,  52 sleeping,   0 stopped,   0 zombie
%Cpu0  :  0.3 us,  0.0 sy,  0.0 ni, 99.7 id,  0.0 wa,  0.0 hi,  0.0 si,  0.0 st
%Cpu2  :  0.3 us,  0.0 sy,  0.0 ni, 99.7 id,  0.0 wa,  0.0 hi,  0.0 si,  0.0 st
KiB Mem :  7949808 total,  6388256 free,   669472 used,   892080 buff/cache
KiB Swap:        0 total,        0 free,        0 used.  7046532 avail Mem
Troubleshooting
The example CloudFormation refereneced in Instance Requirements increases the allowed hops for the Instance Metadata Service v2 (IMDSv2) from 1 to 2 to account for the docker0 bridge. If your enclave startup hangs at the error below, it indicates that you did not reflect the hop change in a customized CloudFormation template, Terraform module or other tool used to launch your instances.
Fetching credentials from IMDSv2
Once successfully changed/fixed, you should see the following pair of log lines:
Fetching credentials from IMDSv2
...
Credentials fetched


